Cookie Week

Monday, October 31, 2011
I have decided that this will be cookie week, as I have a few photos that I haven't shared with you yet.
So first up a topical one.


I made this a little time ago for Miss Cakehead's birthday as I knew she would appreciate the twisted beauty. She decided to frame it rather than eat it!
xxx

Monster snot and bogies...eugh!!!!

Friday, October 28, 2011

Bleurghhh!

The kidlets have persuaded me to come up with a frightful recipe for trick or treaters. It is with great personal sacrifice that I post this, as I have a major aversion to bogies, stemming from a childhood trauma...I really can't go into it!

Anyway I haven't given any quantities as it's just basic meringue and we didn't put enough sugar in, so they tasted fairly foul too. I would suggest using your own tried and tested meringue if you want to create some monstrous bogies!


We used powder egg whites, we added water and beat them until stiff.


 Then we added sugar and beat again until nice and glossy. We separated the mixture into three bowls.


We then added food colouring, there were two greens and a yellow and layered the colours in a piping tube.


The kidlets had a tray each to create drips of bogie. Which went into the oven until crisp.


 The bogies were then packaged and labelled. Big kidlet helped come up with the monster image which we printed onto snot green card.


But look at these poor little monsters with terribly bad colds! Atchoo!


This one has the right idea though and has used a handkerchief to catch the oozing snot.

If you want to download a pdf of the label go here or right click on the image for the jpeg.

And don't forget kids "Catch it, Kill it, Bin it!"
xxx

Baking Mad with Eric Lanlard

Wednesday, October 26, 2011
Just so you know, this isn't a sponsored post infact I never have any sponsored posts on my blog. Maybe it's something I might think about in the future but for now it's all me!
Anyway I received an email from Baking Mad about a new show with Eric Lanlard asking if I would mention it on my blog incase any of my lovely followers fancy having a go and I don't mind giving them a little publicity if it's any interest to you.
Here's what they have to say;

"Are you passionate about baking? Have you got some impressive dessert recipes up your sleeve that could wow even a master baker?
Baking Mad are looking for passionate bakers to compete in a mini bake off for the chance to have a 1-1 lesson with master patissier and baker to the stars Eric Lanlard!
 Twice winner of the prestigious Continental Patissier of the Year at the British Baking Awards, Eric has earned himself an international reputation for show stopping cakes. 
 Do you think you’ve got what it takes to impress Eric with your culinary skills? Then please drop us an email at bakingmad@infinite-media.tv where you will be prompted to fill in one of our application forms telling us why you would like to take part.
We will be filming throughout December and January.
Successful applicants will be needed for one filming day only."

I would love to know if any of you enter, it would be very exciting.
Also do you have strong opinions on sponsored posts? For, or against I'd be very interested.
xxx

Lardy cake recipe

Tuesday, October 18, 2011

OK, not so much of a recipe, more a collection of things that you can throw together and create yumminess!

This is my family's recipe, handed down from generation to generation, but I can pretty much guarantee that most baking families will have a version of this in their arsenal.


It's not a recipe you make especially, it's more a delicious way to use up leftover pastry. You can use any pastry you have, sweet, savoury, puff, flaky, it's all good. (I must admit to making extra pastry though, just so there is enough over for lardy cake).
My Dad is a bit of a pie maker, given any stressful family situation you can find my parents fighting it out for kitchen space, my Mum to make jam and my Dad to bake a pie. this is how they chill!
My Gran was a fabulous pastry maker too, I only cracked the technique while in my forth decade, and I still get a flush of pride (and surprise) when my pies come out airy and crisp.


You will need; pastry, butter, dried fruit (whatever is in your store cupboard), granulated sugar, dark brown sugar and milk.


Roll out the pastry, don't worry about making a perfect circle or having smooth edges, this is rustic!


Butter a baking tray and place the pastry on top.


Scatter the fruit brown sugar and knobs of butter over one side of the pastry.


Brush milk around the edge of the pastry and fold the unadorned side over the fruit.


Press down with your fingers to seal the edge. Make two cuts in the top.


Brush the top with milk and scatter over some sugar.
I bake at 200 c for about 15mins but it will depend on your oven. It's ready when the pastry is cooked and a lovely golden brown.


Wait as long as you can bear for it to cool before you cut it up and taste. This is a dish that never makes it off the tray onto a plate...it never lasts that long. Every time you enter the kitchen you have to have a little slice, sometimes with a bit of butter spread onto the top.

What did your Granny make with her left over pastry? Something just as delicious I'm sure!


xxx


Maple leaf wedding cake


This is the wedding cake and cupcakes I made for a lovely couple at the weekend. They had various Canadian links and wanted to reflect that in their cake. Although they also wanted it to be very simple.
 

They had come up with the idea of maple leaves, so we decided to make the cupcakes maple syrup flavour. The cake was chocolate mud and they had plans to whisk it away to share between them!


xxx

How-to-make an owl pinata

Monday, October 17, 2011

I'm doing well on catching up with my lost blog posts, I hope you agree. Unfortunately this may prove to be a rather unsatisfactory how-to as I didn't take as many pictures as I should have of the process. However I know that my readers are very intelligent and will quickly figure out what you need to do. If you do have any questions please leave a comment below and I will get back to you.


Blow up a massive balloon (bigger than your head) and cover it with three layers of paper mache. You can find the recipe here.


Cut off one of the smaller end.


Let kidlets fill the pinata with sweets.


I have cunningly missed out a stage here for added confusion. Reattach the end with plenty of packing tape but reverse it so it is con-caving into the balloon (this is so the pinata can stand up).

Then allow kidlets to paint the pinata with acrylic paint.


Cut two hole in the top and thread ribbon through, see here also.

Cut up strips of crepe paper and fringe them. Attach with a glue gun starting on the base and working your way up to the top of his head.


Add a beak and eyes with a glue gun.

Admire your creation.

Then let ten 5 year olds batter it with a stick until all that is left is dust!
xxx

The Owl and ladybird party

Wednesday, October 12, 2011


(Finally! It has only taken me a month to get these pictures together for you.)


So, at the beginning of September, my littlest kidlet turned five and requested a party full of owls and ladybirds. I wanted to steer clear of red ladybirds and brown owls, so I went for a white and pastel colour scheme.
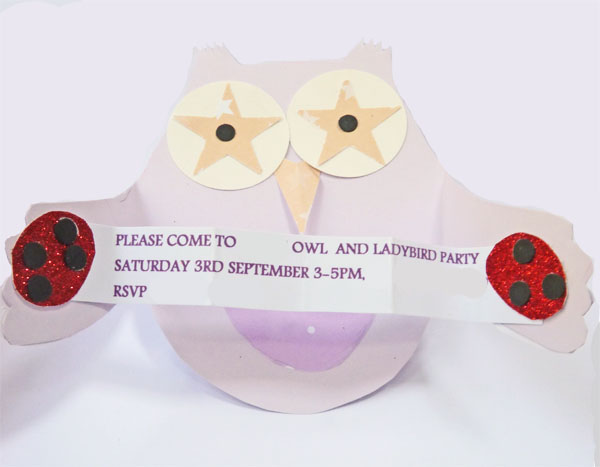
Obviously the kidlets wanted to be as involved as possible, though I am always torn between being a good Mummy and letting them help, and my creative side, which wants to do it all myself. They have started to get a little bit bossy though and one morning, before I awoke, came up with a party invite design themselves. While I admire their initiative I had to put my foot down, as their concept didn't fit in with the grand scheme, so I produced a design the kidlets could stick together for me, and was acceptable.
I had them cut out the leaves for the banners and help as I sewed them together on the sewing machine, they paper mached the pinata and ladybirds, and decorated the party bags (under close supervision!) 


We spent a few months buying up any owl knick-knacks we found in charity shops and then sprayed them white. 
Fortuitously the week before the party the council cut down a tree outside our house and we managed to snag a gorgeous log for decoration.


Of course the cake had to be an owl, although it was very simple as I didn't have too much time to spare.


We also had ladybird cupcakes and cake pops, and my old party favourite, iced gems.


It was a gorgeous sunny day, so I sent the party guests outside for much of the time with mini bug catchers and bubbles. Then there were owl and ladybird masks to colour in. We also had pass-the-parcel and musical bumps and statues.


The party bags included a fabulous felt owl from Heartfelt Handmade, a mini bug catcher, ladybird rubbers and a painted owl cookie, (you can see the how-to paint your own here.)

And not forgetting an owl pinata, I will post the how-to soon.

Little kidlet had a fabulous party and big kidlet would like it to be known that she was the helper (and she was very helpful too)!
Mr LD also chipped in and raided the kidlet's bedroom for toy owls (there are alot... it took some time, although I suspect he was hiding form the party planners!). We hid them around the room for the party guests to spot.


I really love planning parties for my little ones, but I can see the day coming soon when they will want trips to the cinema or bowling alley instead.
Until then I shall keep on planning,  two 2012 parties are already in their early stages, hurray!
xxx

Cakes for Selfridges

Tuesday, October 11, 2011

Ladies and gentlemen it is my great pleasure to introduce to you Nevie-Pie. This is my new logo, I drew her myself and with lots of help from Mr LD created a tag for my goodies.


She has recently made an appearance on some mini Christmas cakes that I took to Selfridges last week.
It was very exciting to finally be delivering, but I was nervous too. It went really well. although next time I need to take a high-vis jacket for the loading area, how glamourous!


They are just in the London store at the moment but by mid November my range of cakes, cookies and gingerbread houses will be in all three stores.


As it is their Christmas launch this Friday I will in the store painting some cakes in the food department and personalising them. Please stop and say hello if you are passing.
xxx

How-to-make an owl invitation

Sunday, October 9, 2011

Or more accurately an owl and ladybird invitation!


Download the template as a jpeg by right clicking on the image below or click here for a pdf. Then choose your card and make some invites! There is no template for the ladybird (sorry).


Back soon with loads more owly goodness!
xxx

Wedding cakes

Tuesday, October 4, 2011

I have been so busy recently, and feel that I have been neglecting you all, so I thought I should catch up and post some wedding cakes.
This cake was based on a design used for the lovely couples invitations. It was a repeated pattern of one rose. We decided to add a little extra interest with the border of roses.


For this next cake I never actually met the bride, we just communicated via e-mails and phone. It was ordered by a mutual friend as a wedding present and managed to survive a five hour journey to Cornwall.

The design is based on the flowers in the brides bouquet including Old Dutch roses, lavender, astrantia and ferns.

Finally, not a wedding cake but a fiftieth wedding anniversary cake. Daisy's are the ladies favourite flowers and she wanted a fairly simple design.


I have plenty more to show you when I get my archives sorted out (probably some time in March!)!
xxx